D1 Justification of Tools Used to Create Image
The image that i created was the new version of windows for the display at the Birmingham NEC. This image is shown below.
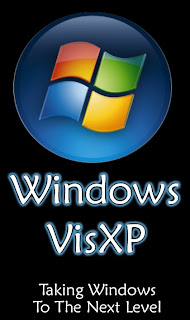
This image met the clients needs because it is large and easy to see. It stands out and can be read easily from afar. Even if you could not see the text you would be able to see the Mcrosoft Wndows logo and know that something was going on at this stand to do with Microsoft.
I used Adobe Photoshop Elements to create this image because of a number of different reasons. Firstly it is easy to create good looking text and make the text big without loosing the quality of it. You can also make text that looks good small, just like the text at the bottom of the image.
I also used this program to make the image because you can easily export the image as a JPEG at 100% quality so the image does not lose quality when exported. You can export is as many different other file formats but JPEG keeps the quality of the Photoshop file and keeps it looking good.
I also used this program because you can change the image resolutions and colour depths easily. Keeping the colour depth at 72 means that the quality of the image is kept to the best that it can be and when printed out the quality is also good. This is because most printers use the 72 bit colour depth as standard and so the quality is not lost. Also you can change the image resolution when ever you want and keep the image quality good. Making the image resolution to big can make the image pixelated but ultimately the image will look the same.
posted by Bez @ 05:57
0 Comments
![]()

0 Comments:
Post a Comment
Subscribe to Post Comments [Atom]
<< Home